
Did you know that over 65% of flooring redos are due to basic installation mistakes? The difference between floors that last for decades and those that buckle, warp, or gap often comes down to just a handful of smart flooring installation tips. Whether you’re tackling a DIY laminate floor, upgrading to hardwood, or installing luxury vinyl, paying attention to these practical techniques can save you thousands and bring out the beauty in your wood, laminate, or vinyl plank. Read on to learn the secrets every flooring pro wishes homeowners knew!

Why Flooring Installation Tips Matter: Surprising Facts and Costly Mistakes to Avoid
Flooring installation tips aren’t just handy—they’re absolutely essential for a flawless floor installation . Without proper guidance and an organized approach, you risk costly installation errors like warped planks, unsightly gaps, or squeaky boards that can ruin the beautiful look of laminate, wood, or vinyl flooring. What many homeowners don’t realize is that skipping key installation steps can even void your flooring warranty or require you to replace entire sections in just a few years.
For example, vinyl plank and wood floors often expand and contract with seasonal humidity. Laying planks too tightly without considering an expansion gap or acclimating your flooring properly can spell disaster. This is why following industry-tested installation tips is a good rule for beginners and pros alike. Armed with proven flooring installation advice, you’ll create durable, attractive surfaces and minimize ongoing maintenance costs.
The Real Cost of Poor Flooring Installation: Startling Industry Statistics
According to national data, improper flooring installation is responsible for more than $1 billion annually in repairs across laminate, wood flooring, and vinyl floor projects. Studies reveal that 70% of these failures are related to issues with the subfloor, skipped acclimation periods, or ignoring expansion gaps. Even minor mistakes, like starting at the wrong end of a room or using the wrong tools (such as avoiding the tapping block), create issues that snowball over time and make the installation a lot harder and more expensive to fix.
In real life, poorly laid vinyl plank often buckles or separates at the seams within a year. Laminate floor installations missing a critical expansion gap tend to develop unsightly peaks and valleys, while hardwood floor installation failures cost, on average, 25% more to repair than their initial installation price. The upshot? Every smart installer knows that preventing simple mistakes is far less expensive than fixing them later.

Common Installation Errors (and How Flooring Installation Tips Prevent Them)
The most frequent errors in flooring install projects involve poor preparation and skipping proven installation tips . A common misstep is neglecting to acclimate the flooring material —especially vital for laminate and hardwood floors that naturally expand and contract with environmental changes. This often results in unsightly gaps or bulging planks that compromise the look and safety of your new floor.
Another major pitfall is poor pattern alignment. Failing to stagger planks correctly during a laminate floor or vinyl plank installation can weaken floor stability and create a mismatched aesthetic. Rushed cuts around door jams or corners frequently lead to visible imperfections and can leave floors vulnerable to moisture intrusion and long-term damage. Careful measurement, the use of tools like a tapping block , and attention to expansion gaps are crucial steps every installer should take. These flooring installation tips not only prevent rookie mistakes but save you time and money in the long run.
Essential Flooring Installation Tips for a Flawless Floor Installation
If you want every floor installation to look professional, slip these essential flooring installation tips into your toolkit. First, always prep your surface: ensure the subfloor is flat, dry, and clean. Second, choose the right materials and tools—different projects (like hardwood flooring versus vinyl plank ) require specialized blades, saws, and spacers.
Don’t forget to read the manufacturer’s instructions fully! Many new laminate or luxury vinyl products offer click-and-lock features or pre-attached underlayments that can make the work a lot easier. Lastly, remember that slow, steady progress usually trumps speed in every wood floor installation . This way, you’ll catch small errors before they become expensive mistakes and enjoy beautiful, lasting results.
Flooring Installation Tips for Laminate Floor Success
For a pristine laminate floor , acclimation and pattern planning are key. Bring your laminate flooring into the room where it will be installed and let it sit for at least 48 hours—this minimizes the chance of expansion or contraction issues. Prep your subfloor meticulously; bumps or dips can cause the click-lock mechanism to fail and create a bouncy or noisy finish.
When installing laminate , stagger seams at least 12 inches for each row. Use spacers to maintain a consistent expansion gap along walls and other fixed objects—a solid rule of thumb is to allow at least 1/4 inch. Always use a tapping block to ensure tight seams without damaging the tongue-and-groove edges, particularly around door jams and corners.
Hardwood Floor Installation: Professional Flooring Installation Tips
When it comes to hardwood floor installation , success hinges on both preparation and patience. Let your wood flooring acclimate in its future home for at least 72 hours. Check the subfloor for level—uneven spots can lead to creaking, premature wear, or even split boards. Lay out a moisture barrier if required, and always use proper spacers for the expansion gap.
Nail or glue boards according to the manufacturer’s recommendations. For plank-style wood floors, stagger boards for strength and visual interest. When cutting near a door jam , use a sharp utility knife or oscillating tool for a precise fit. Professional installers often recommend lightly sanding joints to ensure snug, seamless transitions, especially in high-traffic areas.
Vinyl Plank & Vinyl Flooring: Top Flooring Installation Tips
Vinyl plank and luxury vinyl flooring have become popular for their ease of installation and durability. However, skipping key installation tips can result in popped seams and visible gaps. Always start installation along the longest wall for a clean, balanced look and remember that even vinyl must acclimate for at least 24-48 hours.
Lay planks with the pattern and light source in mind: aligning your vinyl floor parallel with windows helps disguise seams and creates a more natural flow. Use a sharp utility knife for precision cutting, and don’t forget to include an expansion gap along walls, baseboards, and fixed cabinets. A tapping block makes it easier to get tight seams, preventing dust or spills from sneaking under your flooring.
Choosing the Right Flooring Material: Key Flooring Installation Tips
Choosing the right flooring material is arguably the most important step in every successful floor installation . Whether you’re considering wood flooring for its natural elegance, luxury vinyl for waterproof toughness, or laminate flooring for its affordability and quick install, each material has unique properties that affect how you prepare, cut, and lay it out.
For high-traffic areas, water resistance and durability matter most. Basements do well with vinyl floor or luxury vinyl planks, while living rooms are ideal for the visual warmth of hardwood flooring or laminate floors . If your home’s subfloor isn’t perfectly level, a forgiving material like vinyl may save you headaches. Refer to the table below for a quick comparison of common flooring materials and their best-use scenarios.
| Material | Pros | Cons | Best Use |
|---|---|---|---|
| Laminate Flooring | Affordable, scratch-resistant, easy DIY install | Can swell with moisture, requires expansion gap | Living rooms, bedrooms |
| Hardwood Flooring | Classic look, long-lasting, increases home value | Costly, susceptible to scratches and moisture | Living spaces, formal rooms |
| Vinyl Plank Flooring | Waterproof, durable, low-maintenance | May fade in direct sun, seams require care | Basements, kitchens, bathrooms |
| Luxury Vinyl | Soft underfoot, authentic patterns, easy clean-up | Can be punctured by heavy furniture | Mudrooms, laundry, high-traffic areas |
| Wood Flooring | Natural beauty, various options, can be refinished | Expensive, may expand or contract | Dining and family rooms |
Preparation Is Critical: Pre-Installation Flooring Installation Tips
Proper prep lays the foundation for perfect flooring installation . Before you even open the first box, let your chosen flooring material rest in the installation room (acclimate) for 48-72 hours. Why? Because floors—especially laminate flooring and wood floors —expand and contract with changes in temperature and humidity. Skipping this step often leads to warping or splitting over time.
Also, fix any subfloor imperfections. Sweep thoroughly, and use a level to spot dips or humps. If possible, run a dehumidifier a day ahead. Careful pre-planning ensures a smooth, quiet wood floor installation or a seamless click-lock floor that lasts for years to come.
How to Properly Acclimate Flooring Materials for Any Floor Installation
One of the most overlooked installation tips is simple: leave unopened boxes of laminate floor or hardwood flooring in the room where they’ll be installed for at least 48-72 hours. This lets the planks “breathe” and adjust to the room’s climate. Place the boxes flat and spaced apart, allowing air to circulate. Especially for vinyl plank and laminate flooring , this step prevents installation-day surprises such as warped or gapping boards after the first season’s weather change.
For concrete subfloors, ensure moisture levels are within manufacturer’s specs—too much trapped humidity can destroy even the best wood floor or luxury vinyl plank. Consider this crucial step as insurance for your new floor’s durability and beauty.
Understanding Expansion Gap Needs in Flooring Installation
Expansion gaps are a must with wood flooring , laminate floors , and even many types of vinyl floor . As seasons change, floors naturally expand and contract. Failing to leave a gap around the room’s perimeter or at fixed features like door jams is a primary cause of buckling and squeaking. A good rule of thumb is to use the spacers provided and check the manufacturer’s guidelines—usually 1/4 to 1/2 inch.
Never fill expansion gaps with grout or adhesive. Cover them later with trim or baseboards for a neat, finished look. Prioritizing this seemingly small step ensures your flooring install withstands the test of time.
“An extra day prepping your flooring materials can save you years of headaches down the road.” – Flooring Expert
Installation Tips for Success: Starting Your Flooring Install Correctly
Begin every floor installation the right way by laying your first row of planks along the longest, straightest wall in the room—usually the exterior wall for the most visible result. This approach creates an even plank flow and minimizes small, difficult cuts along visible traffic areas. If you start against a crooked wall, you’ll struggle to disguise uneven seams throughout the room.
Measure twice, lay out a dry run with spacers, and make sure the planks line up well across the threshold or doorway. Taking these small steps early on aids tight seams, prevents frustration later, and earns you the satisfaction of a true flooring pro job.

Where to Start: Professional Insights on Floor Installation for a Laminate Floor or Vinyl Plank
Professional installers always stress: begin in the corner of the longest, most visible wall. In open plans, laying planks parallel to the source of natural light hides seams and enhances visual flow. This technique works wonders for both laminate floors and modern vinyl flooring , ensuring each row fits perfectly and adjustments at door jams or tight corners are straightforward.
Starting from the correct position also makes your flooring install a lot easier. It allows you to avoid frequent, small end-cuts—especially important when handling tongue-and-groove systems or click-lock laminate floor designs. As a good rule, always dry-lay the first two rows to visualize staggering and pattern.
Tools You Need for Seamless Flooring Installation: Don’t Skip These Steps
Every flawless flooring installation relies on the right tools. Some essentials you’ll want in your kit: a tapping block for snug seams, a level to spot uneven spots, a door jam saw for undercutting trim, spacers for even expansion gaps, a sharp utility knife for cutting laminate or vinyl plank, and knee pads for comfort during long projects.
Don’t underestimate the value of using the manufacturer’s recommended tools, as well. Specialized saws or guides can save time and prevent damaged edges during a wood floor installation or when working with premium luxury vinyl board. Consistently using the right gear means fewer mistakes and a professional, lasting result that stands up to daily wear.
- Tapping block
- Level
- Flooring spacers
- Door jam saw
- Utility knife
- Knee pads
- Rubber mallet
- Measuring tape and pencil
- Moisture barrier (if needed)
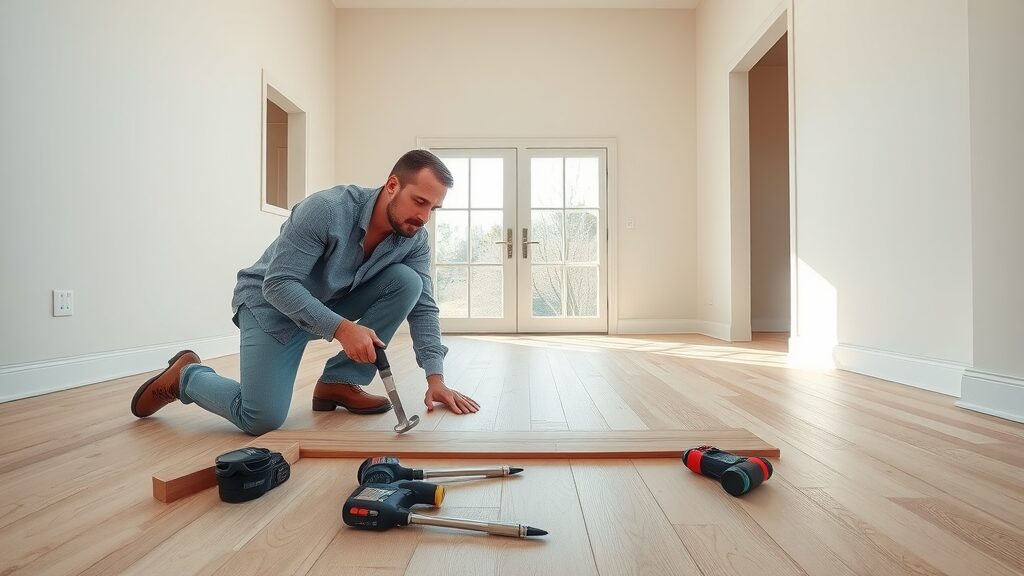
Using a Tapping Block: Flooring Installation Tips for Tight Seams
A tapping block is one of the unsung heroes of every floor installation . It ensures tight, even seams without damaging the sensitive tongue-and-groove edges of your laminate flooring or vinyl plank . Place the block against the edge of the plank and strike it gently with a mallet. This encourages a tight fit, reduces visible seams, and prevents moisture or dust from infiltrating the joints.
Skipping this step is a fast track to gapped, uneven floors—especially on longer runs. The right technique with a tapping block also makes it much easier to work around a door jam or tricky room features. Don’t rush; consistent, patient taps yield the best finish, just like the flooring pros do.
Key Techniques: How to Install Laminate, Wood, or Vinyl Flooring Like a Pro
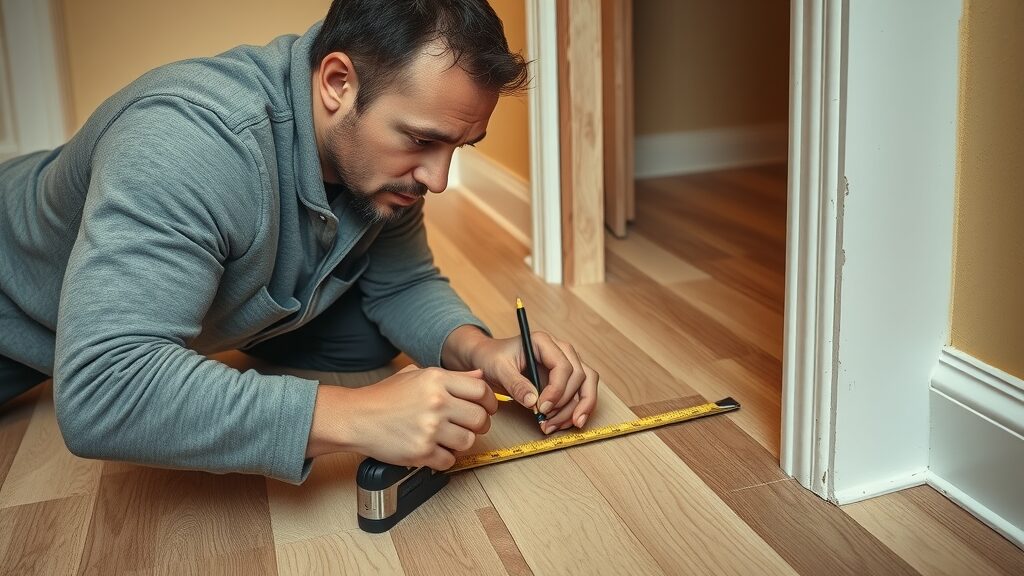
Want to install laminate or wood flooring like a true professional? Start with careful measurement—especially near door jams and corners—and plan your row layout to minimize narrow plank widths at room edges. Always stagger joints between rows for maximum stability and eye appeal.
As you go, check each row with a level, especially on longer runs. Use spacers for the expansion gap and follow the flooring installation tips outlined above for each specific material. Small investments in tools and time pay huge dividends in the professional look and feel of your finished floor.
Precise Cutting & Fitting Around Door Jams and Corners in Flooring Installation
Working around a door jam is one of the trickiest parts of any floor installation , regardless of whether you’re dealing with laminate , wood floor , or vinyl plank . The best approach is to use a sharp utility knife for vinyl or an oscillating saw for wood and laminate. Undercut the trim enough to allow planks to slide beneath without stress or force—never “bump up” the board against a jam or it may bind and squeak.
Always mark boards with precision and cut small notches rather than wide openings for a snug fit. “Dry fit” planks before the final installation. This extra attention makes your final floor look seamless, minimizing finishing trim and maximizing the sense of quality throughout the room.
Laying Planks: Patterns and Flow for Laminate Flooring and Vinyl Plank Installation
The way you lay your planks has a dramatic impact on the look and strength of your finished floor. For most laminate floor and vinyl plank installations, running planks parallel to the longest wall or main light source delivers the best visual flow. This tends to hide minor seams and makes rooms feel larger and more cohesive.
Always stagger end joints by at least 12 inches between rows. Randomizing patterns avoids repeating seams and results in a stronger, more professional floor installation . Planning ahead prevents problems as you reach doorways or unusual angles, so measure and cut those tricky planks before starting each row for a stress-free experience.
“Attention to detail when fitting around a door jam sets apart a good flooring install from a great one.” – Pro Installer
Avoid These Missteps: Flooring Installation Mistakes to Watch For
Even the most meticulous DIYers can fall prey to common flooring installation mistakes. Top offenders include skipping the acclimation period, squeezing planks too tightly (ignoring expansion gaps), starting in the wrong place, and forcing planks together or apart until they splinter. Each of these simple errors can turn a beautiful floor into a costly headache within just months of installation.
By following proven installation tips like using a tapping block, maintaining proper expansion, and methodically planning your install, you make the job a lot easier and ensure a professional, lasting result. Don’t let impatience cost you extra money—do it right the first time!
- Skipping acclimation of flooring materials
- Ignoring the required expansion gap
- Starting the installation on a crooked or short wall
- Forcing planks into place (risk of chipping, buckling, or splintering)
Real-World Flooring Installation Tips: Lessons from the Pros
Seasoned installers all agree: there are no shortcuts to a flawless flooring installation . Slow down when laying your first two rows—getting those straight sets the tone for the entire project. Always check that seams are tight and that expansion gaps are consistent, even if you’re pressed for time. Take frequent “sight checks” from multiple angles, especially around doorways and transitional strips.
Finally, invest in affordable upgrades such as quality spacers, a professional tapping block, and sturdy knee pads . Small investments make the job easier and your floors better.
“Even veteran installers rely on these essential flooring installation tips to ensure every floor looks perfect.” – Master Carpenter
What Not to Do When Installing Vinyl Plank Flooring
Vinyl plank flooring offers outstanding durability, but there are key pitfalls to avoid for flawless results. Never install vinyl plank in extreme temperatures or before letting it acclimate. Avoid shoving planks together—a common mistake that can close off expansion spaces and cause buckling. Skipping an underlayment when recommended can also lead to noisy floors or excessive wear.
Always follow the manufacturer’s sequence for locking planks and make sure seams are snug but not overtightened. Failing to include a perimeter expansion gap or ignoring undercutting at door jams can result in a visibly uneven surface. These simple installation tips will help you avoid rookie errors and get sturdy, beautiful floors.

Pitfalls to Avoid in Vinyl Plank Floor Installation
Common mistakes with vinyl plank flooring include installing in a humid environment without moisture checks, neglecting to acclimate planks, failing to plan the first row layout, and skipping spacers. Forcing planks to fit into a tight area can damage edges and lead to future issues with gaps or buckling.
Be alert for the temptation to cut corners, such as not following the plank sequence or using makeshift tools instead of a tapping block or saw. Always take your time—following these flooring installation tips guarantees a successful, frustration-free installation and a luxury finish that lasts.
Common Mistakes When Laying Laminate Flooring
Installing laminate flooring may seem straightforward, but it’s full of hidden traps for beginners. One of the most frequent issues is improper acclimation—without it, planks may shrink, swell, or separate soon after installation. Skipping the expansion gap is another top mistake, and so is failing to stagger seams, which can undercut both appearance and durability.
Rushing cuts around obstacles, especially at door jams or heating vents, often leads to unsightly gaps or uneven transitions. Always double-check measurements and complete dry-lays before final installation. Investing that bit of extra time in prep and careful cutting distinguishes high-quality floors from amateur jobs.
Laminate Floor Installation Tips: Spotting Mistakes Early
Catch installing laminate mistakes early by regularly checking for tight seams, consistent expansion gaps, and even plank alignment. Look along the length of each row before you lock in the next to ensure a uniform appearance. If you notice a plank that doesn’t fit right, fix it immediately rather than trying to correct the error later—it’s much easier at the start than after several rows are complete.
Take special care around transitions like doorways and baseboards. Even small gaps or raised plank edges at these locations are a clear sign something’s amiss and should be corrected before moving on with your flooring install .
When Putting in Flooring, Where Do You Start?
Always start your floor installation along the longest, straightest, and most visible wall in the room. This helps keep rows running parallel and prevents the need for narrow slivers at the finish, which are not only harder to cut but more likely to move out of place over time. For large, open rooms, align your planks with the main light source (like windows) to minimize visible seams and create a natural-looking flow throughout the space.
It’s best to “dry lay” the first two rows before locking planks together. This gives you a chance to adjust the pattern, check for misalignments, and ensure the expansion gap is consistent. These steps make the process run a lot smoother from start to finish.
Best Starting Point for Flooring Installation
The pros recommend always starting from the corner of the longest wall and working outwards. This creates a straight reference for the eye and makes staggered seams easier to maintain. Avoid starting in hallways, closets, or against short or crooked walls, as these make it harder to achieve a professional look and can result in more off-size cuts at visible transitions.
Persistently check that long rows remain parallel and that the pattern lines up as you work across the space. This attention to detail pays off with a uniform, attractive floor that stands the test of time—even in high-traffic areas.
What Happens If You Don’t Let Flooring Acclimate Before Installing?
Failing to acclimate flooring material before installation invites disaster. Without time to adjust to the new room’s temperature and humidity, wood floors , laminate floors , and vinyl plank can expand or contract unpredictably. The result? Gaps, buckled edges, or warped planks just weeks or months after installation.
This problem isn’t just cosmetic; improper acclimation can void your warranty and require partial or complete floor replacement. For every flooring material , acclimation is the most important step for long-term performance and satisfaction.
Consequences of Skipping Acclimation in Floor Installation
If you skip acclimation, your new flooring install is at risk. When environmental conditions cause the planks to expand and contract, you might see unsightly seams, cupping, or even lifting boards. This can cause trip hazards or persistent squeaks that are difficult to repair without starting over.
Especially with wood floor installation or high-traffic vinyl plank areas, acclimation directly impacts durability and comfort underfoot. To prevent costly redo’s, never ignore this critical early step.
Answers to Top Flooring Installation FAQs
- How long does a laminate floor take to settle? Most laminate floors settle within 48-72 hours as they finish acclimating to the room. You can walk carefully on them right away, but wait to move heavy furniture until at least 24 hours after installation.
- Why is a tapping block needed? A tapping block ensures tight seams during installation, protecting plank edges from chips and damage while delivering a long-lasting, professional finish.
- Can luxury vinyl be installed without underlayment? Some luxury vinyl has attached underlayment, but many types require a separate pad for moisture protection and cushioning. Always follow your product’s guidelines for best results.
Take Your Next Step: Great Flooring, Great Service
Ready to enjoy flawless floors? Get quality flooring and 5-star service—call HomeTown Floors today at (636) 244-4951 or book online at www.hometownfloorsonline.com!
Key Takeaways for Flawless Flooring Installation
- Choose the right materials for your project.
- Use proven flooring installation tips at every stage.
- Rely on tools like a tapping block and maintain proper expansion gaps.
- Start your floor installation in the right spot.
- Don’t skip acclimation for laminate flooring, vinyl plank, or hardwood flooring.
Flooring Installation Services in O’Fallon, St. Charles County & Surrounding Areas
HomeTown Floors is proud to serve homeowners and businesses with professional flooring installation, hardwood, vinyl plank, carpet, and tile services throughout O’Fallon, St. Charles County, and the Greater St. Louis area. Our service areas include Ballwin, Chesterfield, Des Peres, Eureka, Fenton, Frontenac, Innsbrook, Jefferson County, Kirkwood, Lincoln County, Manchester, St. Charles, St. Peters, Sunset Hills, Town & Country, Union, Washington, Weldon Spring, Wentzville, and Wildwood.
We specialize in flooring design consultations, product selection, and expert installation to give your home or business a beautiful, long-lasting finish. Trust HomeTown Floors for 5-star flooring service and local expertise that sets us apart in Missouri.